what is Connected Components Workbench (CCW)
Published on Feb16, 2023 | Category: IntroductionWhat Is Difference Between Connected Components Workbench (CCW) Standard Edition And Developer Edition
in Connected Components Workbench (CCW) Standard Edition you can use simulation only 10 minute demo, but in developer edition unlimited simulation, better user experience, some changes in design and development. Connected Components Workbench (CCW) Standard Edition Is Free To Use But Connected Components Workbench (CCW) Developer Edition Required License. If You Want To Learn About Connected Components Workbench (CCW) So You Can Download Connected Components Workbench (CCW) Standard Edition Directly From Rockwell Site. I Mention The Link In Above List.
Supported Device In Connected Components Workbench (CCW)
- plc (controller): micro 800 series plc like micro 810, micro 820, micro 830, micro 850, micro 870.
- drives: kinetix 3, powerflex 4 class(powerflex 4,powerflex 4m,powerflex 40,powerflex 400 etc.),powerflex 520 series, powerflex 750 series,powerflex 7-class,powerflex dc,powerflex dc-fc
- soft starter: e200,SMC-50,SMC- flex
- safety: 440 safety relays, and 450 L light curtains, msr57
- graphics terminals: panel view 800, and panel view component
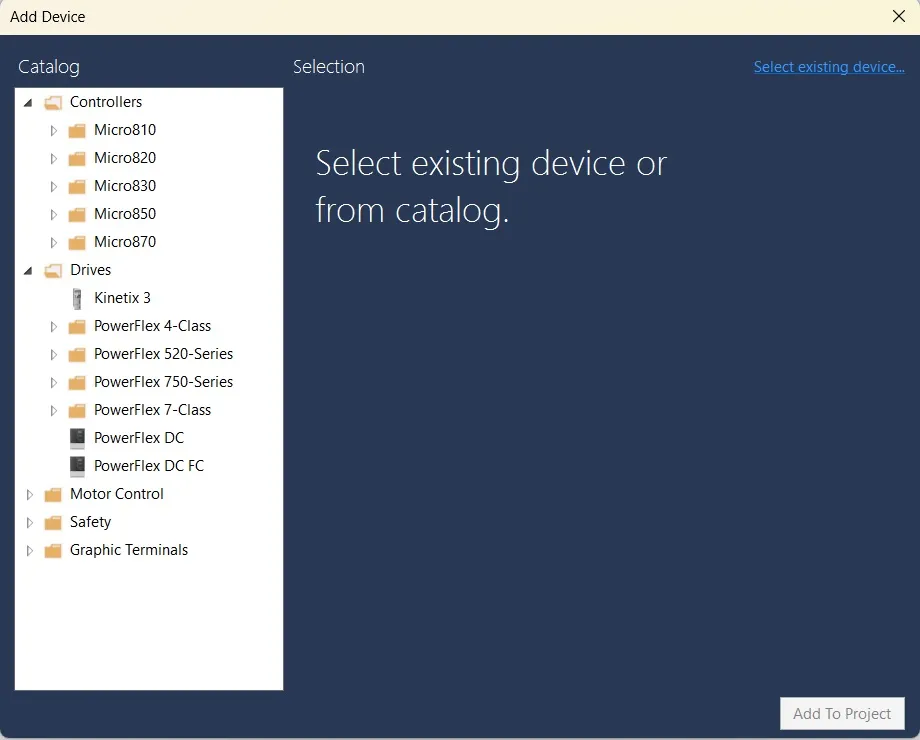
how to add device in Connected Components Workbench (CCW)
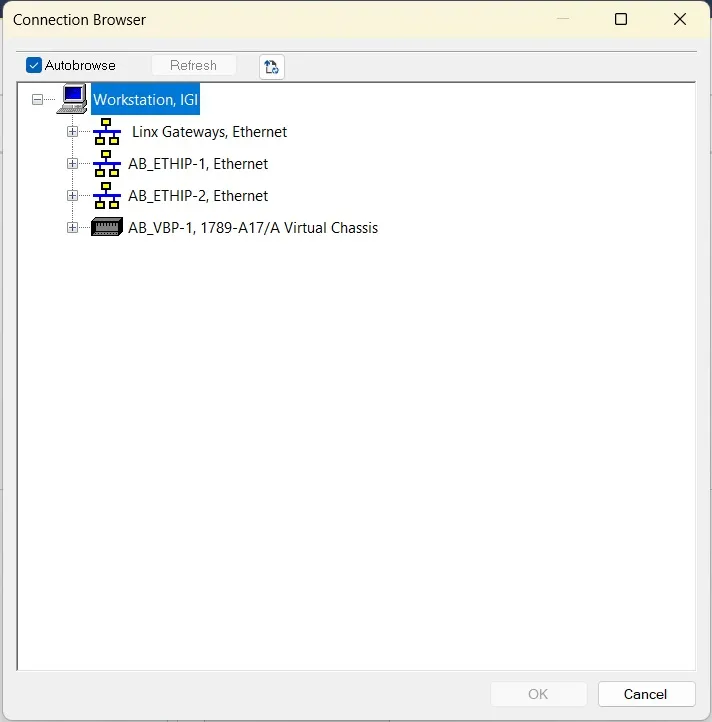
In Connected Components Workbench (CCW) If You Want To Connect Or Add Device So Click On Add Device Or Use Discover Device Of Network Only Above Device Are Able To Connect In Connected Components Workbench (CCW). When You Click On Add Device Than Add Device Dialog Box Is Open In That Dialog Box You Can Select Your Device, Select Proper Version And Add To Project To Your Project If Your Device Is Already Connect With Rslinx Than You Can Choose Discover Option And Select Your Device From Connection Browser.
if your device is alredy connect with rslinx than you can choose discover option and select your device from connection browser.
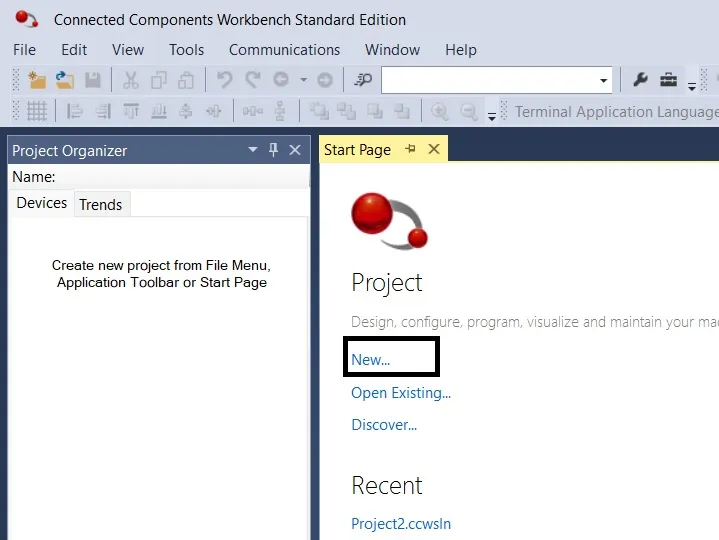
Get started with Connected Components Workbench
first click to new and enter the name of your project than click to create.
now next step to add device on your project. here i am selecting micro 830 plc. use following step to adding device in your project

- 1: select controller.
- 2: select proper modal and serial number of your device.
- 3: select a version of your project.
- 4: device details
- 5: click on select button to adding a device.
- 6: click on add to project.
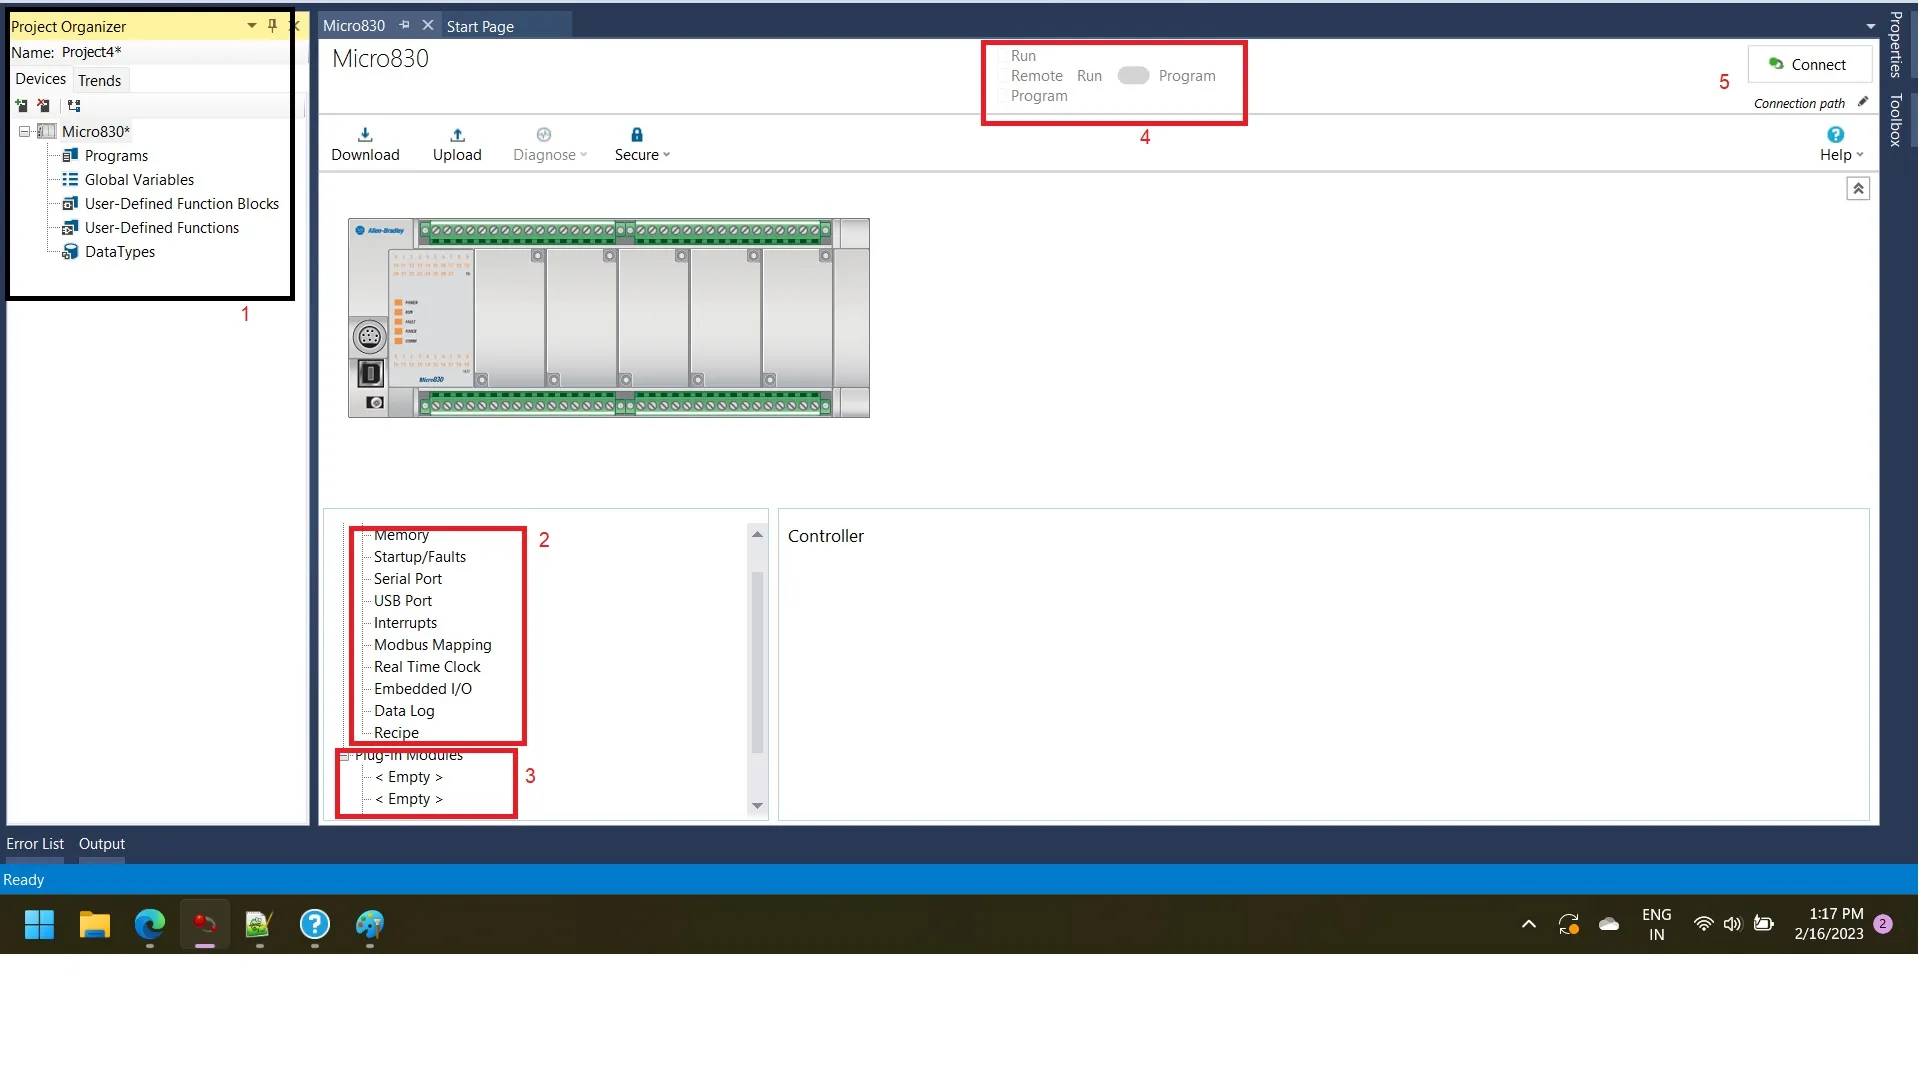
- 1: Project Organizer Here You Define Your Main Program, Routine, Add On Block, User Program Etc.
- 2: controller property like communication, serial port, usb port, modbus mapping etc.
- 3: Plug In Module Add A New Supported Module Like Analog, Digital Etc Module .
- 4: select controller in run or program mode.
- 5: connect with your controller.
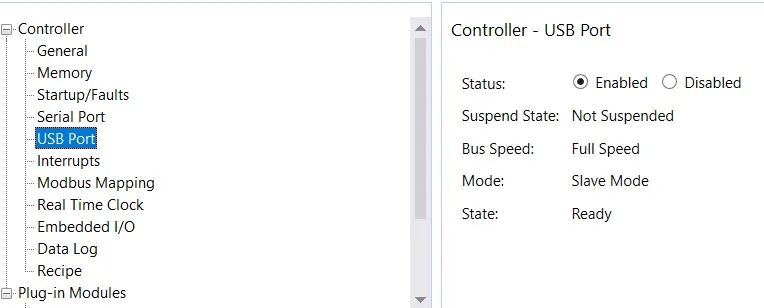
communication in Connected Components Workbench
first define communication property of your controller here i am using usb port for communication. you can also select ethernet or serial property which depends on your controller.
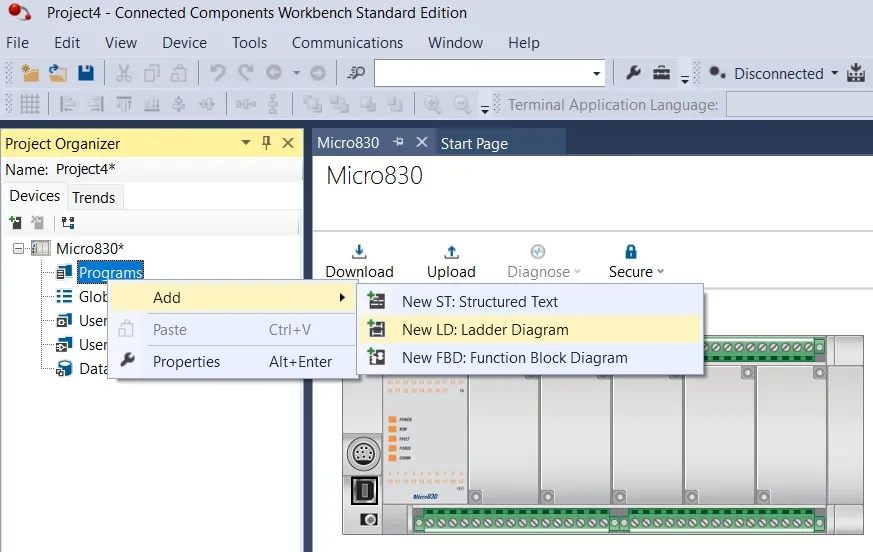
how to make program in Connected Components Workbench
For Making A Program In Connected Components Workbench Go To Project Organizer Than Select Program Right Click On It And Select Your Programming Language.
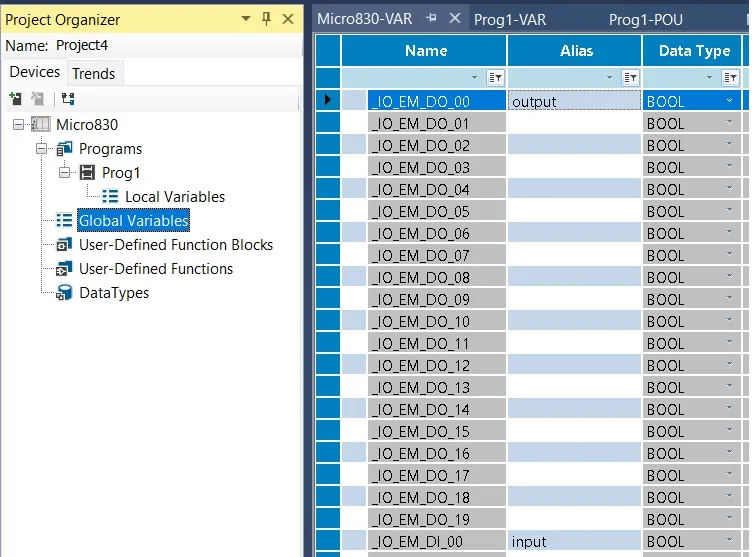
Define Variables In Connected Components Workbench
Define Local Or Global Variable Of Your Program. I Am Using Global Variable For Making A Simple Start Stop Push Button. We Discuss About Global Variable And Local Variable Some Other Article.
make a program in Connected Components Workbench
open your program
Than Add A Instruction In Your Program Select Defined Variable Save And Compile.
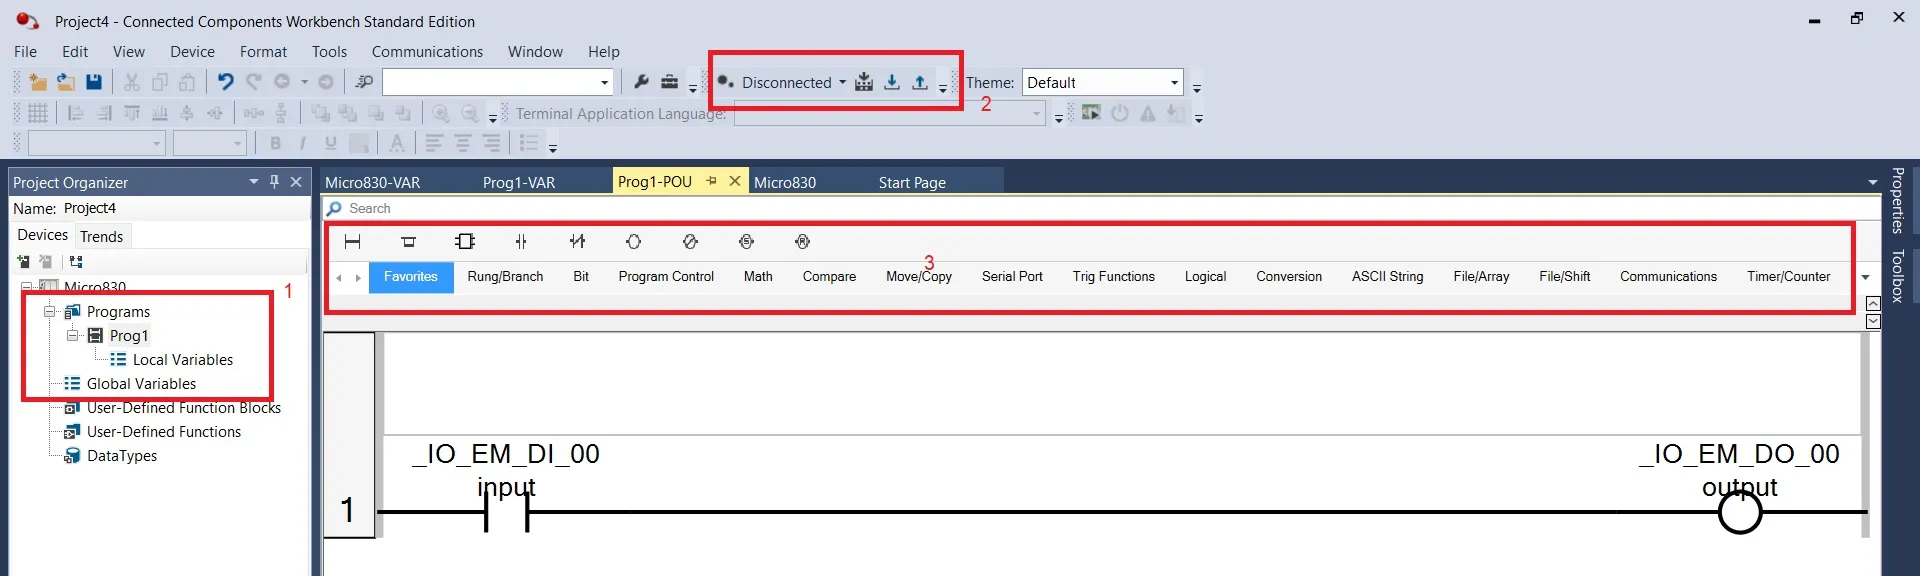
- 1: Program And Variables
- 2: Compile, Build, Download And Upload
- 3: Instruction Set
download and upload program in Connected Components Workbench
set the project path of your device by selecting device from connection browser than press connect and than download or upload your program to device
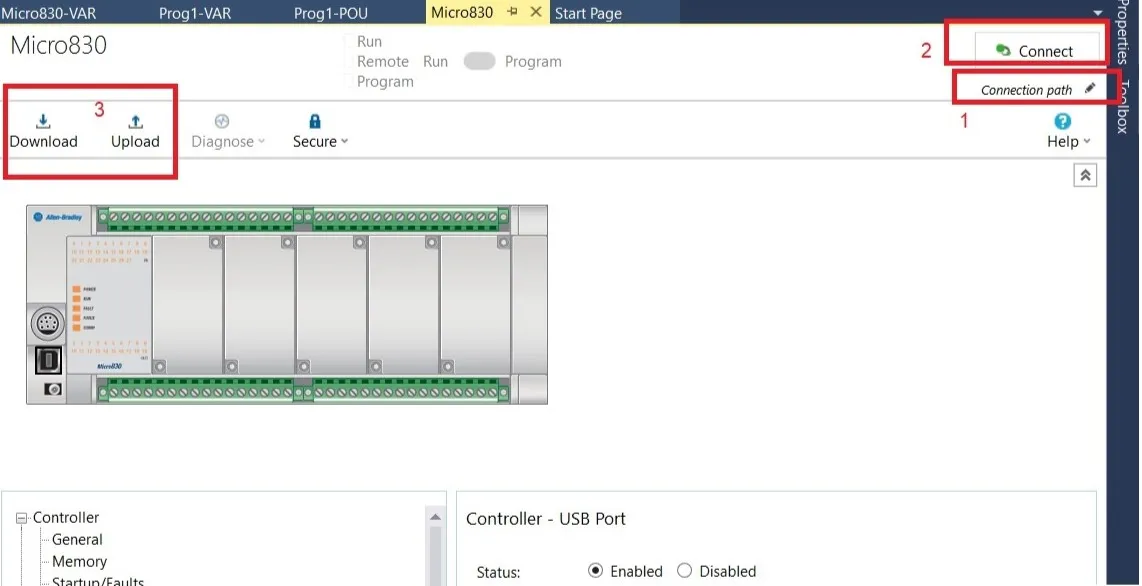
- 1: set project path.
- 2: connect to controller.
- 3: download and upload program to controller.
How To Make Program In Simulation Mode In Connected Components Workbench
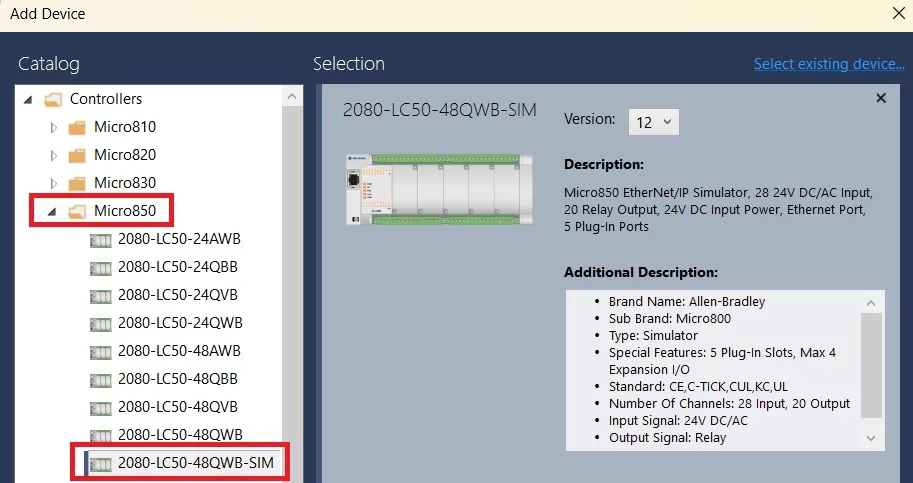
it is possible if don't have real physical controller so you can simulate controller. in Connected Components Workbench have special device in micro 850 series controller namely 2080-LC50-48QWB-SIM.